First I suppose I should start by saying that to build you need to go to a sandbox, there are plenty of these in Second Life, but I always go to Skidz, as they have a brillant large one which is reset regularly to keep lag low, and is full of helpful people! (They also have very handy private sandboxs which are free to use for as long as you need :P). I will put the landmark at the bottom of this tutorial.
Note: You will want to known how to use your camera controls before starting this tutorial, as they will be extremely useful!
Okay, I will go through the steps as slowly and descriptively as possible, if you have any questions feel free to ask!
1) Opening up the build menu
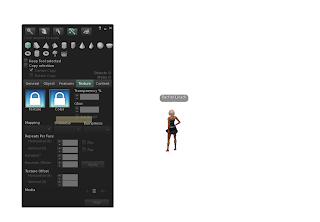
To open up the Build Menu right click on the ground near you and a box will pop up, click "edit" and the Build Menu should now be on your screen, or if that didn't work you click "ctrl" + "b". You will now have something that looks like this...
 The Build Menu looks complicated, but don't worry because I am going go through it slowly with you! :)
2) Rezzing a Prim
"Rezzing" is the term we use for when objects are loading in Second Life on our screens.
A "prim" is the object that we rez. Every single object in Second Life is known as a prim.
Therefore we call it rezzing a prim.
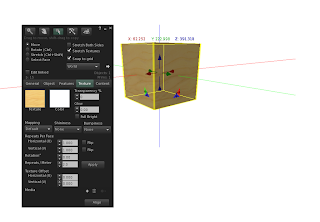
To do this all you have to do is make sure that at the top of the build menu, the second tab on the right is selected (it is a picture of a wand). When that is selected, we are now going to select our shape we want to use, we are going to choice a cube, so click the picture of a cube (first on left), then click near you and you wooden cube will appear!
3) Moving the prim
 To freely move the prim is very easy, you will see three arrows coming from the prim, a green, red and blue one.
Click and drag the blue arrow up, and your prim will move up, drag it down and it will move down.
Click the red arrow sideways, and that will move it across the x axis.
Click the green arrow the opposite way to the red, and that will move it along the y axis.
Easy isn't it? :P
Note: The maximum height, width and length is 10 meters.
4) Copying the prim
To make two prims exactly the same all you have to do is hold down shift, choice a arrow (I chose the blue one, and drag it that way along, and you will end with two prims! This will be a very handy tool for alligning prims correctly)
Now I deleted ONE of the prims, as I do not need them both anymore!
5) Resizing the prim
In your build menu, you have another bar of tabs in the middle, saying General, Object, Features, Texture and Contents.
Click Object
Under Size, change the x axis to 1.0 and your prim will now stretch to become longer.
Now, change the y axis to 1.0, this will increase the width.
Finally change the z axis to 1.0, the will increase the height!
Have a experiment with copying and resizing :)
6) Naming and describing it
Click on the General tab
Then under name, name it whatever you want, I called it Wooden Cube.
You can describe the object if you wish, I put a little note in, typing "Tutorial Tool".
7) Taking the object into your inventory
All you have to do for this is to right click on the prim, and select take.
If you wish to carry on experimenting with your prim, click take copy, it will take a copy of the prim into your inventory.
In part 2, you will learn to link prims together, and experiment with the prim learning to create holes, cut and do much more with it! :D
Visit Skidz Isle: Skidz Isle (49,70,31)


No comments:
Post a Comment